She is giving it to her grandmother for her 90th birthday.
She e-mailed me 20 pictures in sepia tone, spanning five generations.
She also bought the fabrics.
She e-mailed me 20 pictures in sepia tone, spanning five generations.
She also bought the fabrics.
 To put the photos on fabric you can buy ready to print sheets at craft stores,
OR
you can treat 100% cotton with Bubble Jet. It is a liquid you soak your fabric in and let dry. Then you iron freezer wrap, shinny side down towards fabric, it will stick to it.
This is the more cost effective way of doing it.
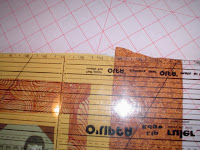
 Using a rotary cutter with a paper blade (this would be a dull one, not a good one saved for fabric only), measure and trim the sheet to the size of 8.5" by 11", to run through the printer.
 First I had the pictures printed at Wal-Mart and ran them through the printer, but they looked more black and white than sepia. So then I ran them directly from the computer to the printer. This helped the color greatly.
 I cut strips of yellow, 2" wide and framed in each picture
and then squared them up leaving a 1" frame.
 I laid them out on the bed. Because these pictures are vertical and horizontal it caused a bit of a problem, so on some of the squares I added an extra strip to make the rows even.
 To do again, I would have cut the orange strips to be 5-6" wide,
then squared them up so I would not have had to add the
extra strips to make the blocks large enough.
 I sewed 5 rows of 4 squares. Evened them up, then sewed the rows together.
Then square the whole quilt up.
 Cut yellow strips 2" wide.
Sewed these as a boarder to the quilt top,
sides first, then the top and bottom.
 Spray baste the top to the batting.
After sandwiching the quilt together,
I stipple quilted it on the machine.
 Fold the binding over and blanket stitch the binding down on the backing.
 Add a label, with the grandmother's name and a couple of verses.
(click on the photo to enlarge)


4 comments:
Kathy, that is so amazing! I will have to look for the bubble jet stuff to do labels on the 'puter!
Oh my goodness what a beautiful quilt! I bet the recipient will be misty over this gift! I followed the link you provided on Marmee's yahoo group - I love your blog!
Blessings,
Courtney
The quilt turned out so nice! I like the dark corners on the pictures. It makes it look like you took the pictures right out of a picutre album!
Beautiful quilt. Thanks for the tutorial. Please, if I may ask, could you post a tutorial on toothpaste soap? It looks wonderful!
Post a Comment